Connecting Stellarium to PushNav
PushNav doesn't have its own sky chart. It uses Stellarium instead. Stellarium is a free, open-source planetarium app with a beautiful sky chart, thousands of deep-sky objects, and it runs on all platforms. PushNav plugs into Stellarium as a virtual telescope, so you get the best of both: Stellarium for finding and picking targets, PushNav for guiding you there.
This is a one-time setup. Once it's done, Stellarium and PushNav reconnect automatically every time you start them.
What you'll end up with
- A live crosshair on Stellarium's sky chart showing exactly where your telescope is pointing, updating in real time as you push
- One-click target selection: click any object in Stellarium and press a keyboard shortcut to send it to PushNav
- Push direction in PushNav's side panel ("left 2°, down 1°") until the target is centered in your eyepiece
What you'll need
- Stellarium installed on the same computer as PushNav
- PushNav installed and running
Step 1: Enable the Telescope Control plugin
Open Stellarium and press F2 to open Configuration. Click the Plugins tab, then scroll the left list and select Telescope Control.
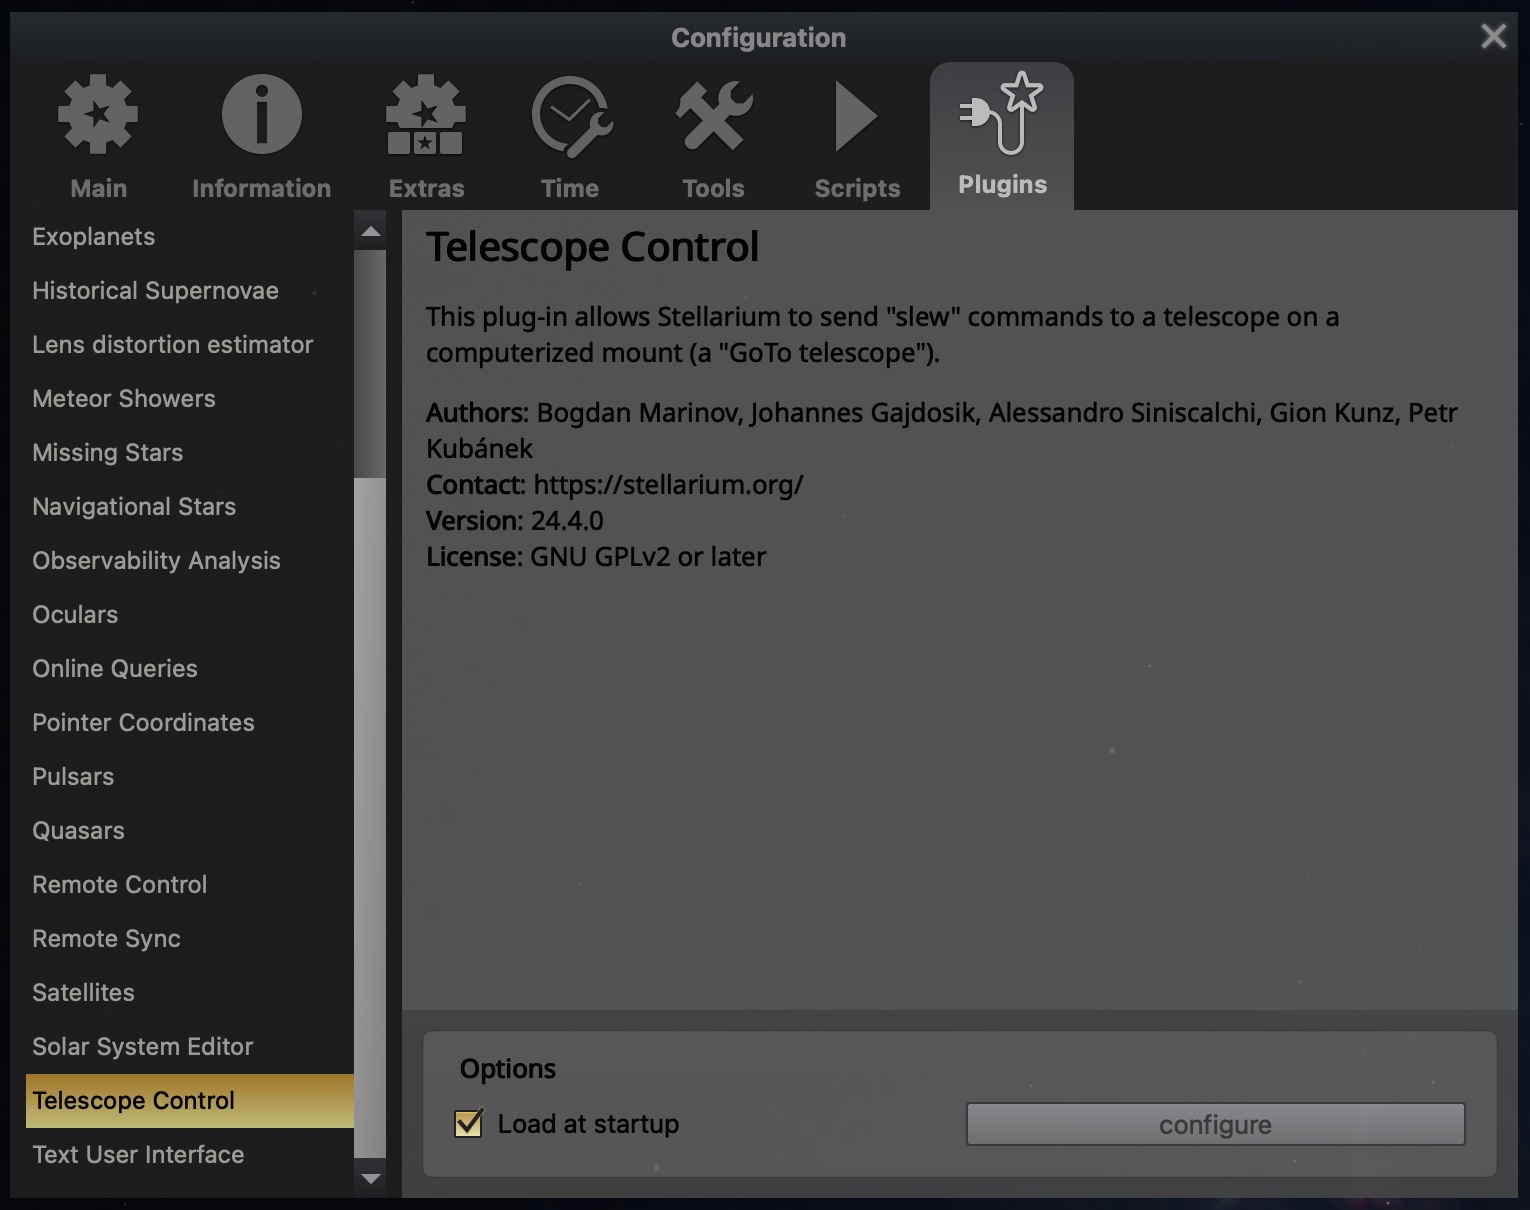
Tick Load at startup, then restart Stellarium. The plugin only activates on startup.
After restarting, go back to Configuration → Plugins → Telescope Control and click configure.
Step 2: Create a new telescope
You'll see an empty Telescopes Controlled list.
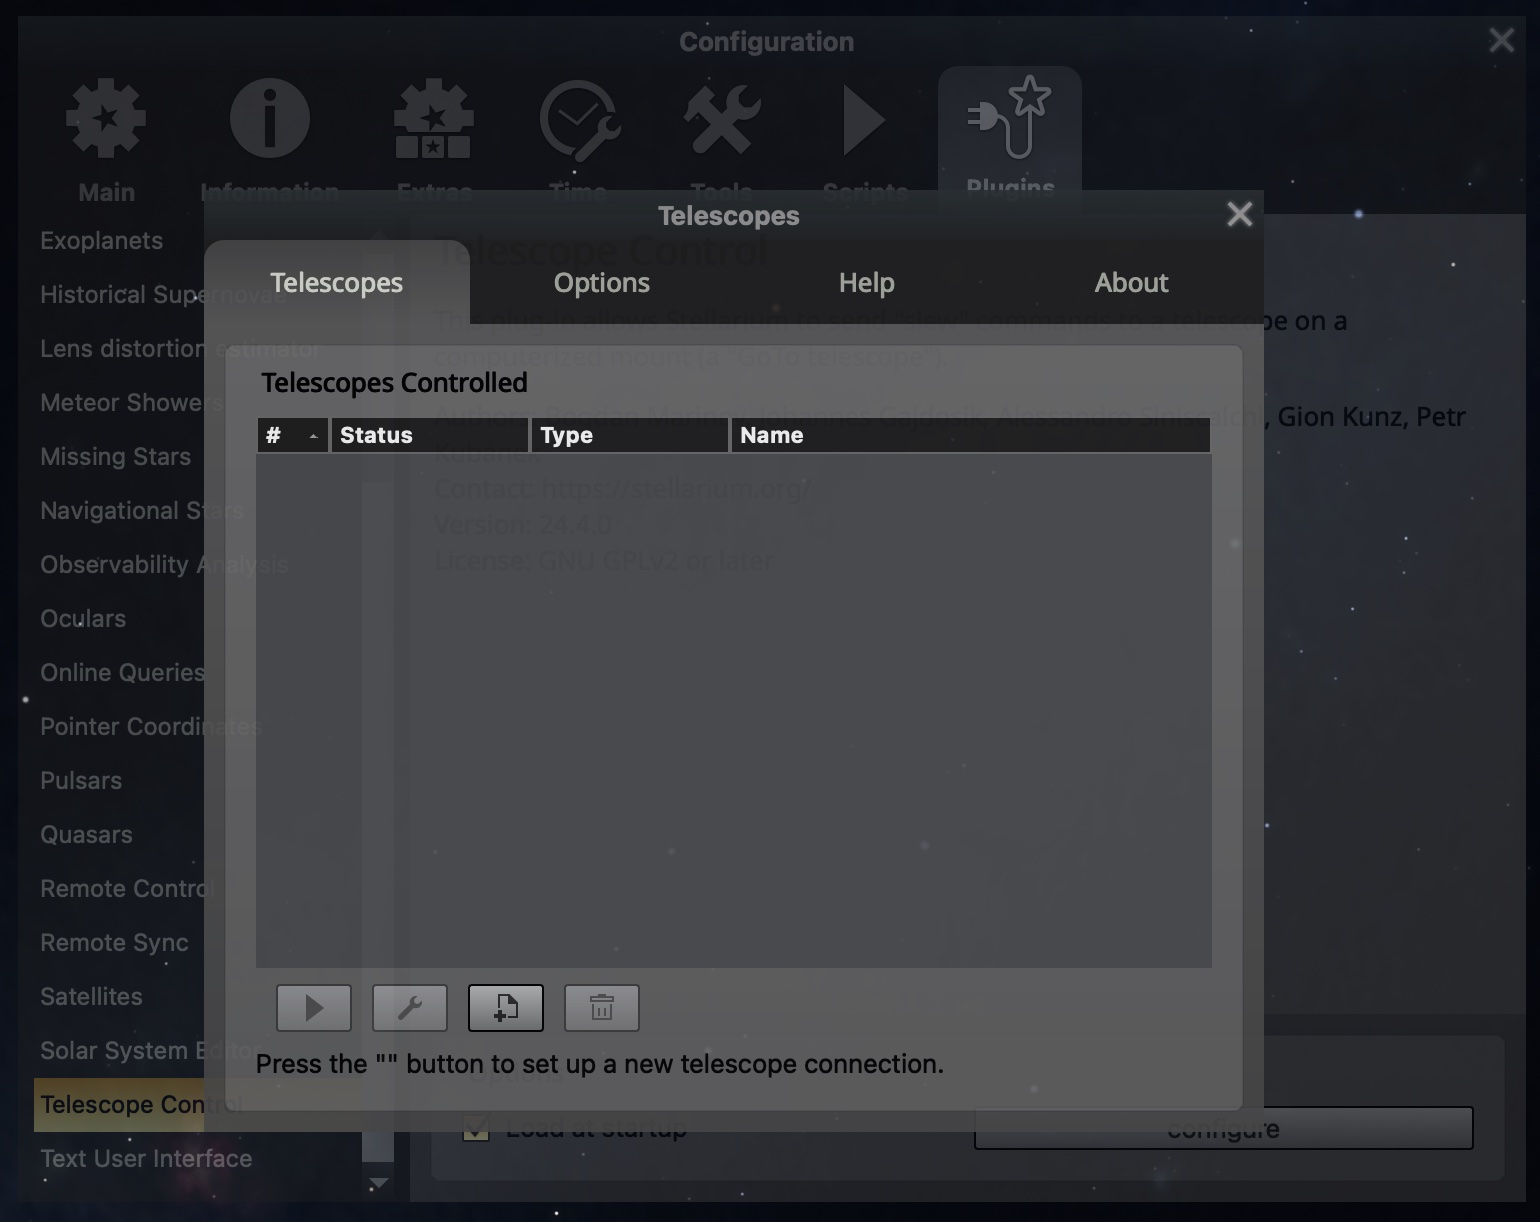
Click the + button at the bottom to add a new telescope.
Step 3: Configure it for PushNav
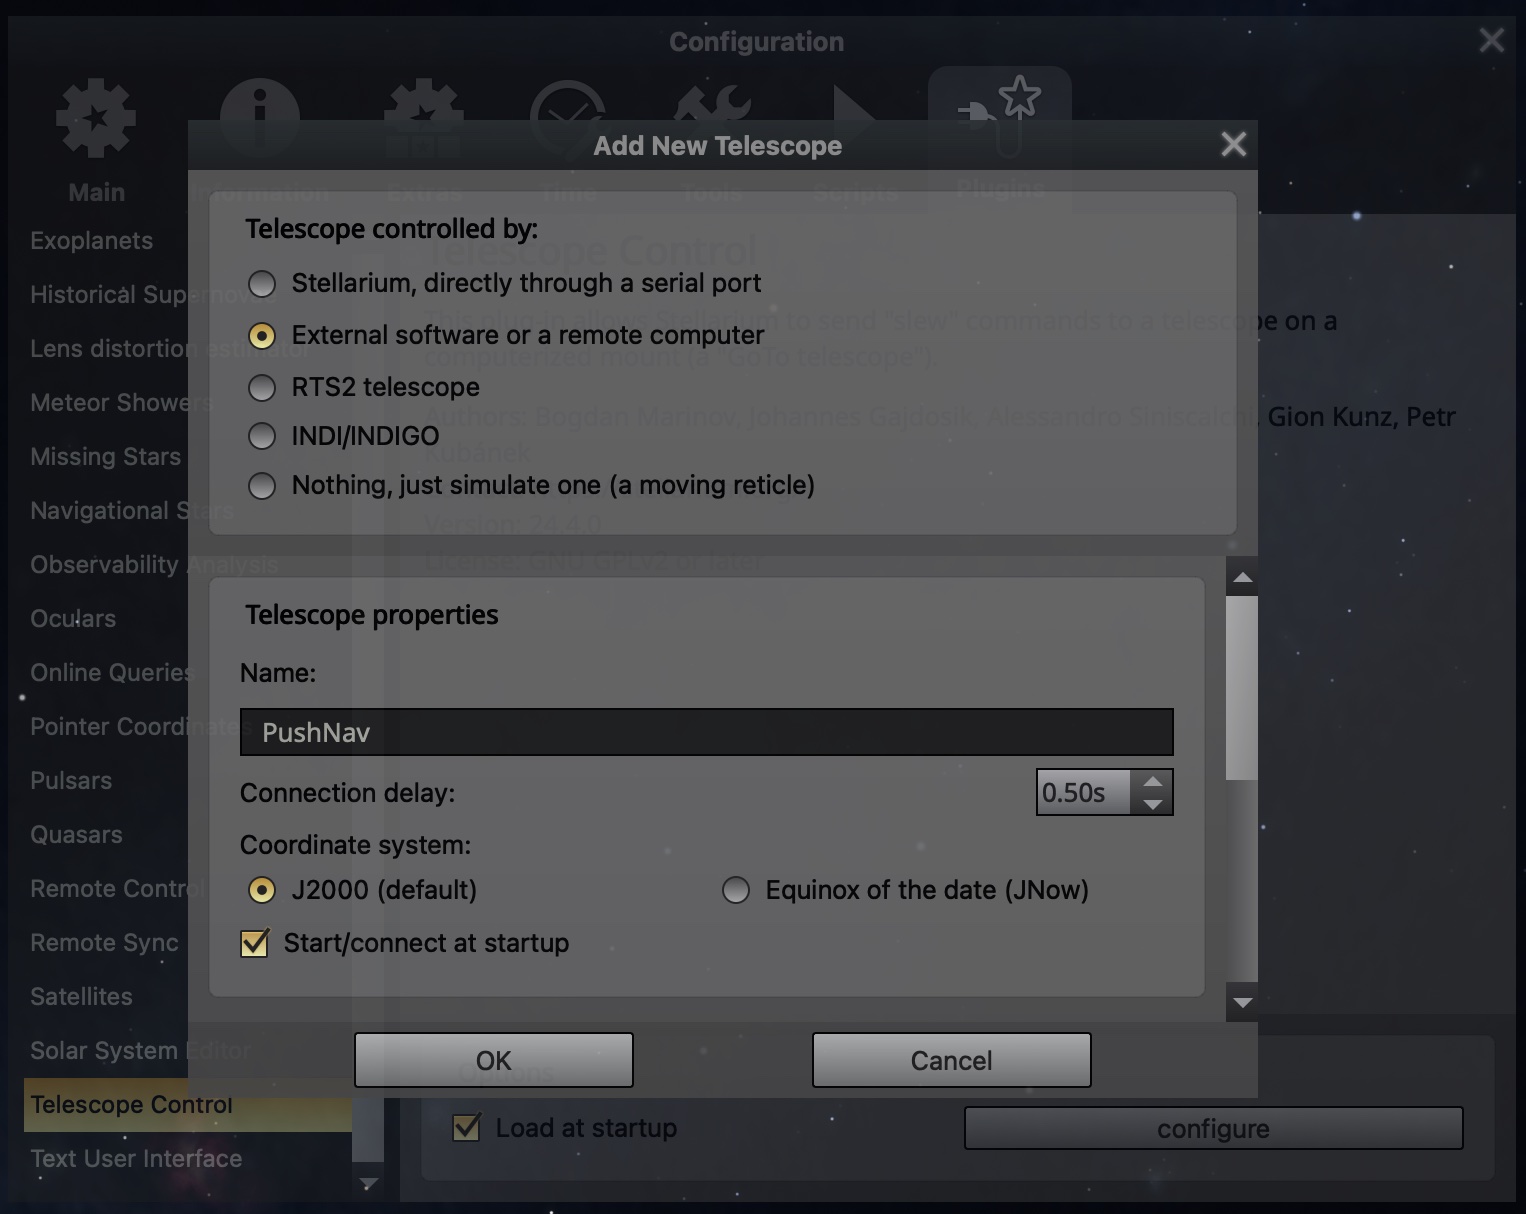
Fill in the dialog like this:
| Setting | What to pick |
|---|---|
| Telescope controlled by | External software or a remote computer |
| Name | PushNav (or whatever you like) |
| Coordinate system | J2000 (default) (don't change this) |
| Start/connect at startup | ✓ tick this |
Scroll down and set:
| Setting | What to enter |
|---|---|
| Host | localhost |
| TCP Port | 10001 |
Leave the coordinate system on J2000
PushNav only speaks J2000 coordinates. If you switch this to JNow, the crosshair in Stellarium will be slightly off from where your telescope is actually pointing. If things seem "close but not quite right," this is almost always the reason.
Click OK.
Step 4: Connect
PushNav now appears in the list as Disconnected.
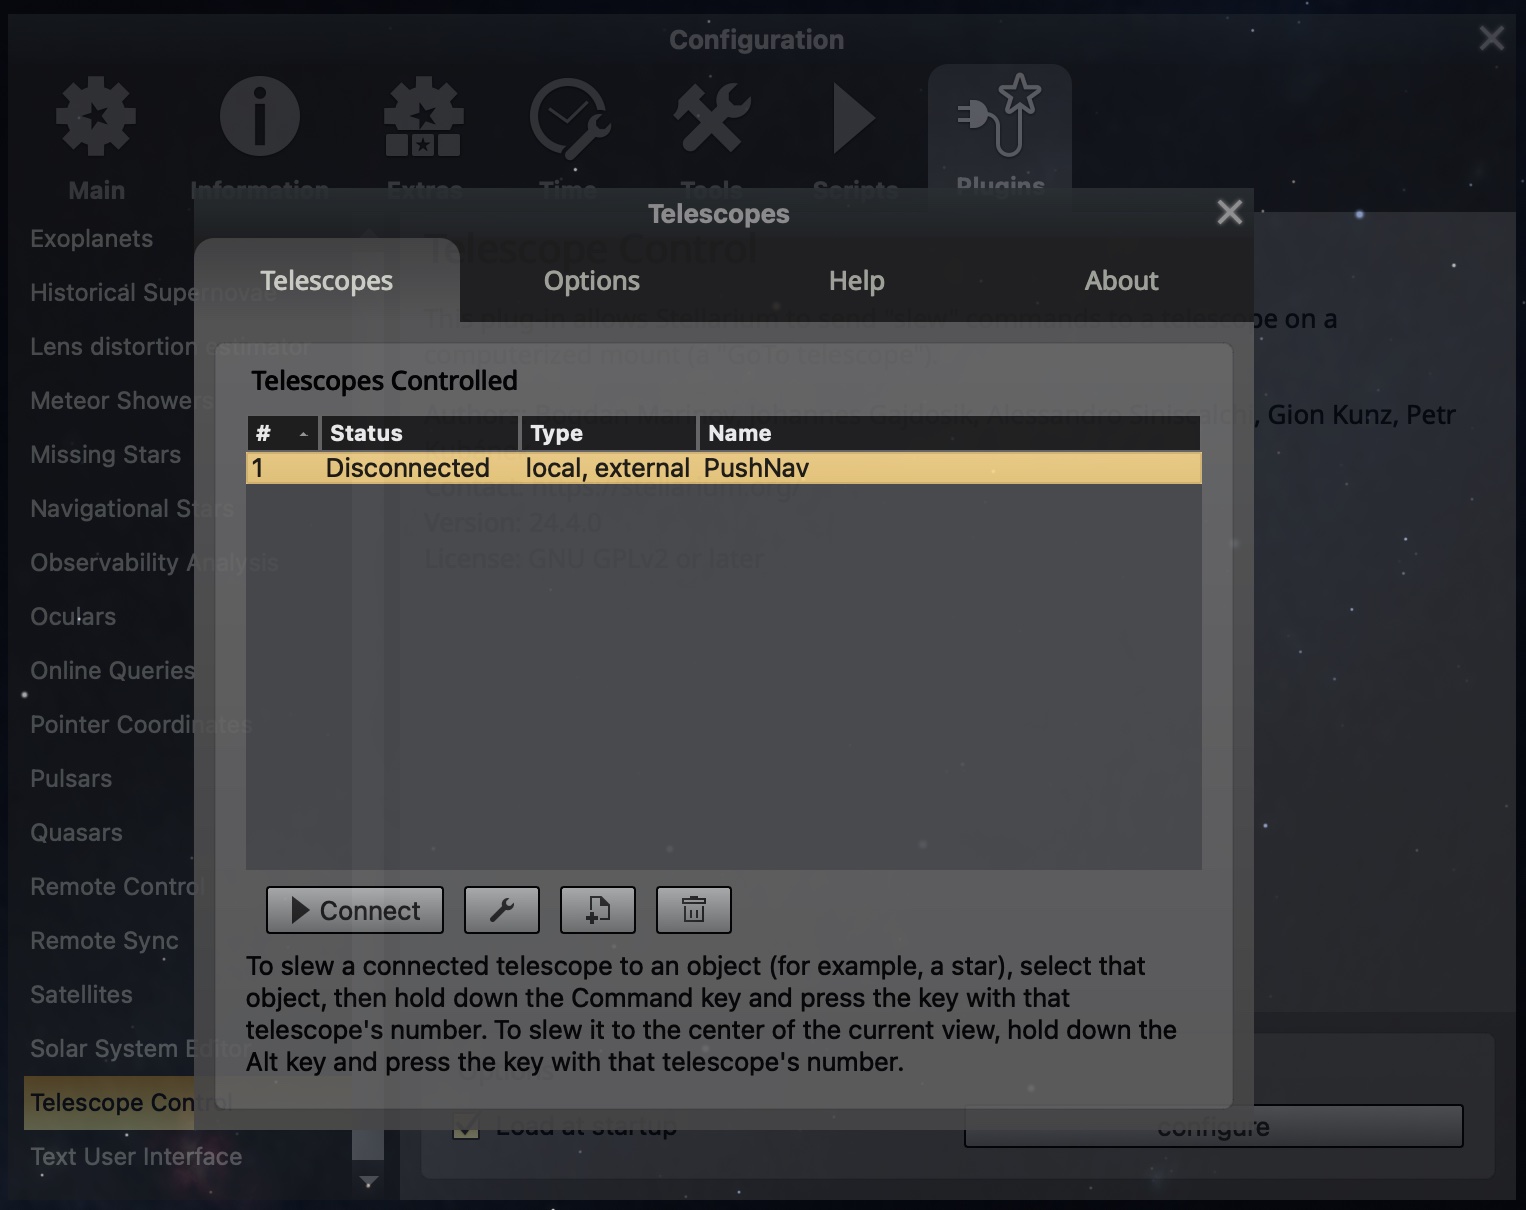
Make sure PushNav is running, then click Connect.
Step 5: Verify
The status should change to Connected within a second.
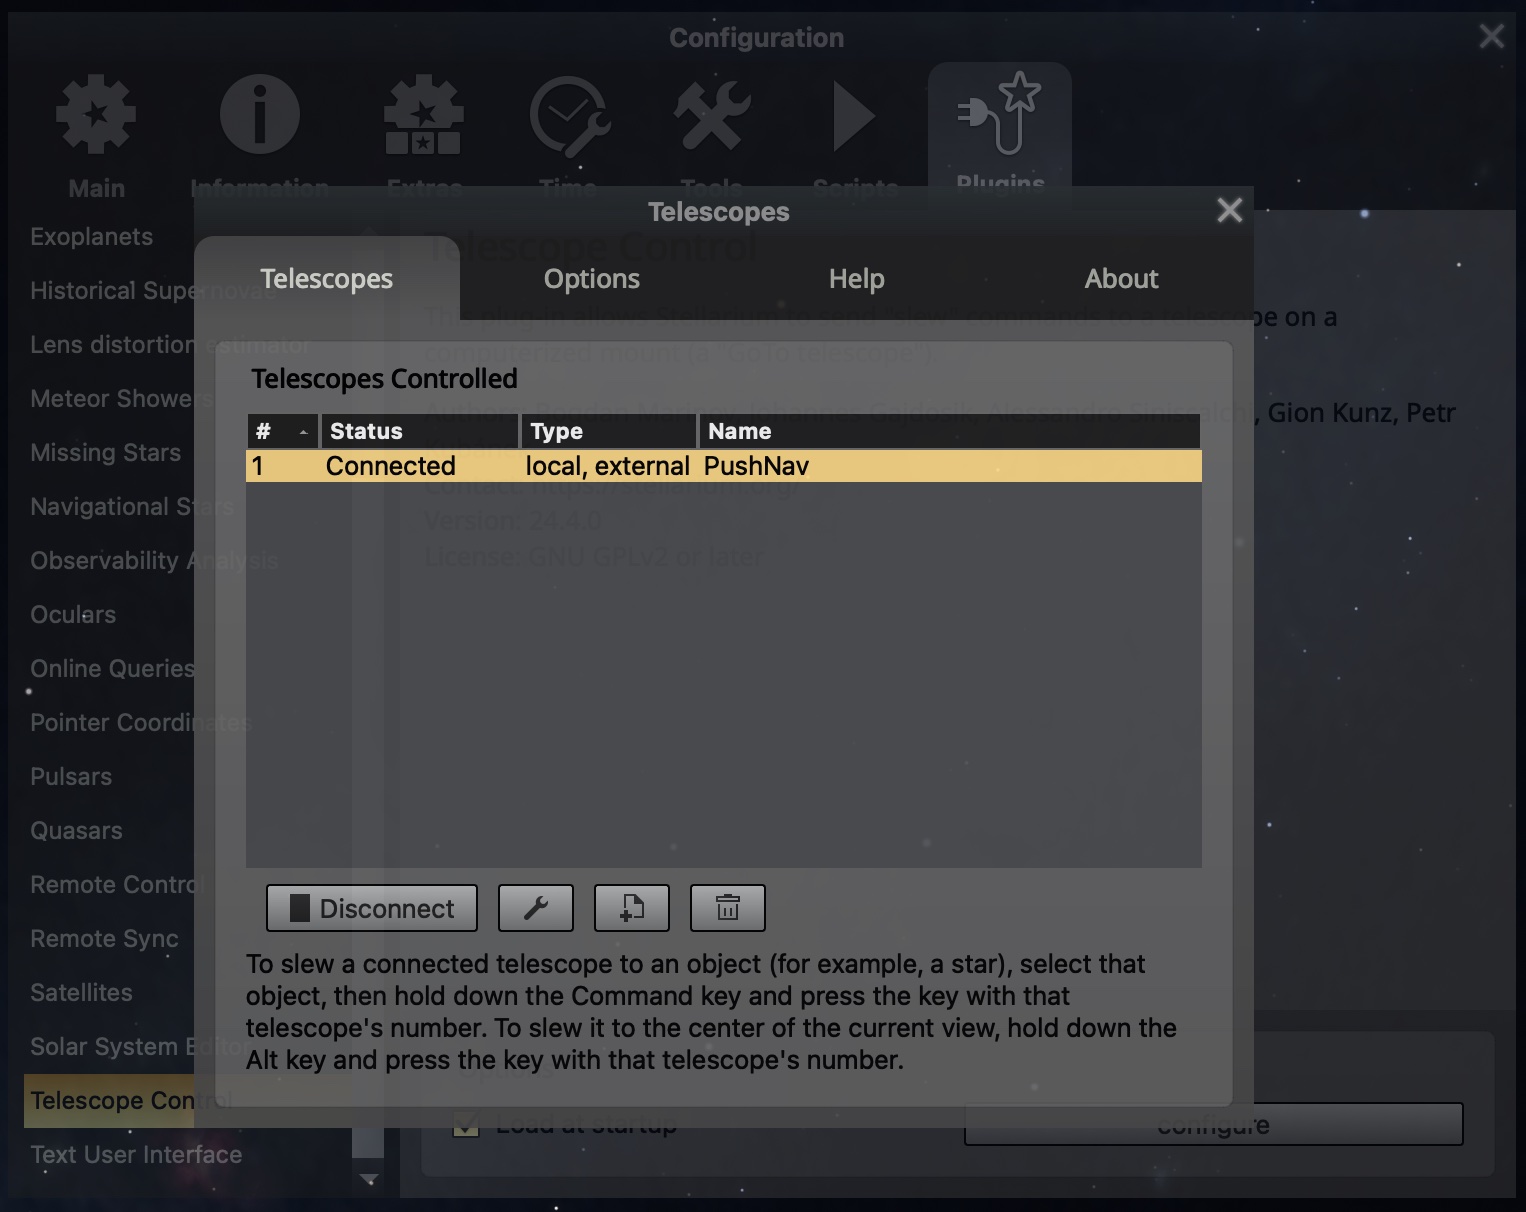
That's it for setup. Close the dialog. Because you ticked "Start/connect at startup," this will happen automatically from now on. You won't need to open this dialog again.
Step 6: See the crosshair
Look at Stellarium's sky chart. You'll see a small crosshair labelled PushNav. This is where your telescope is pointed right now, updating live.
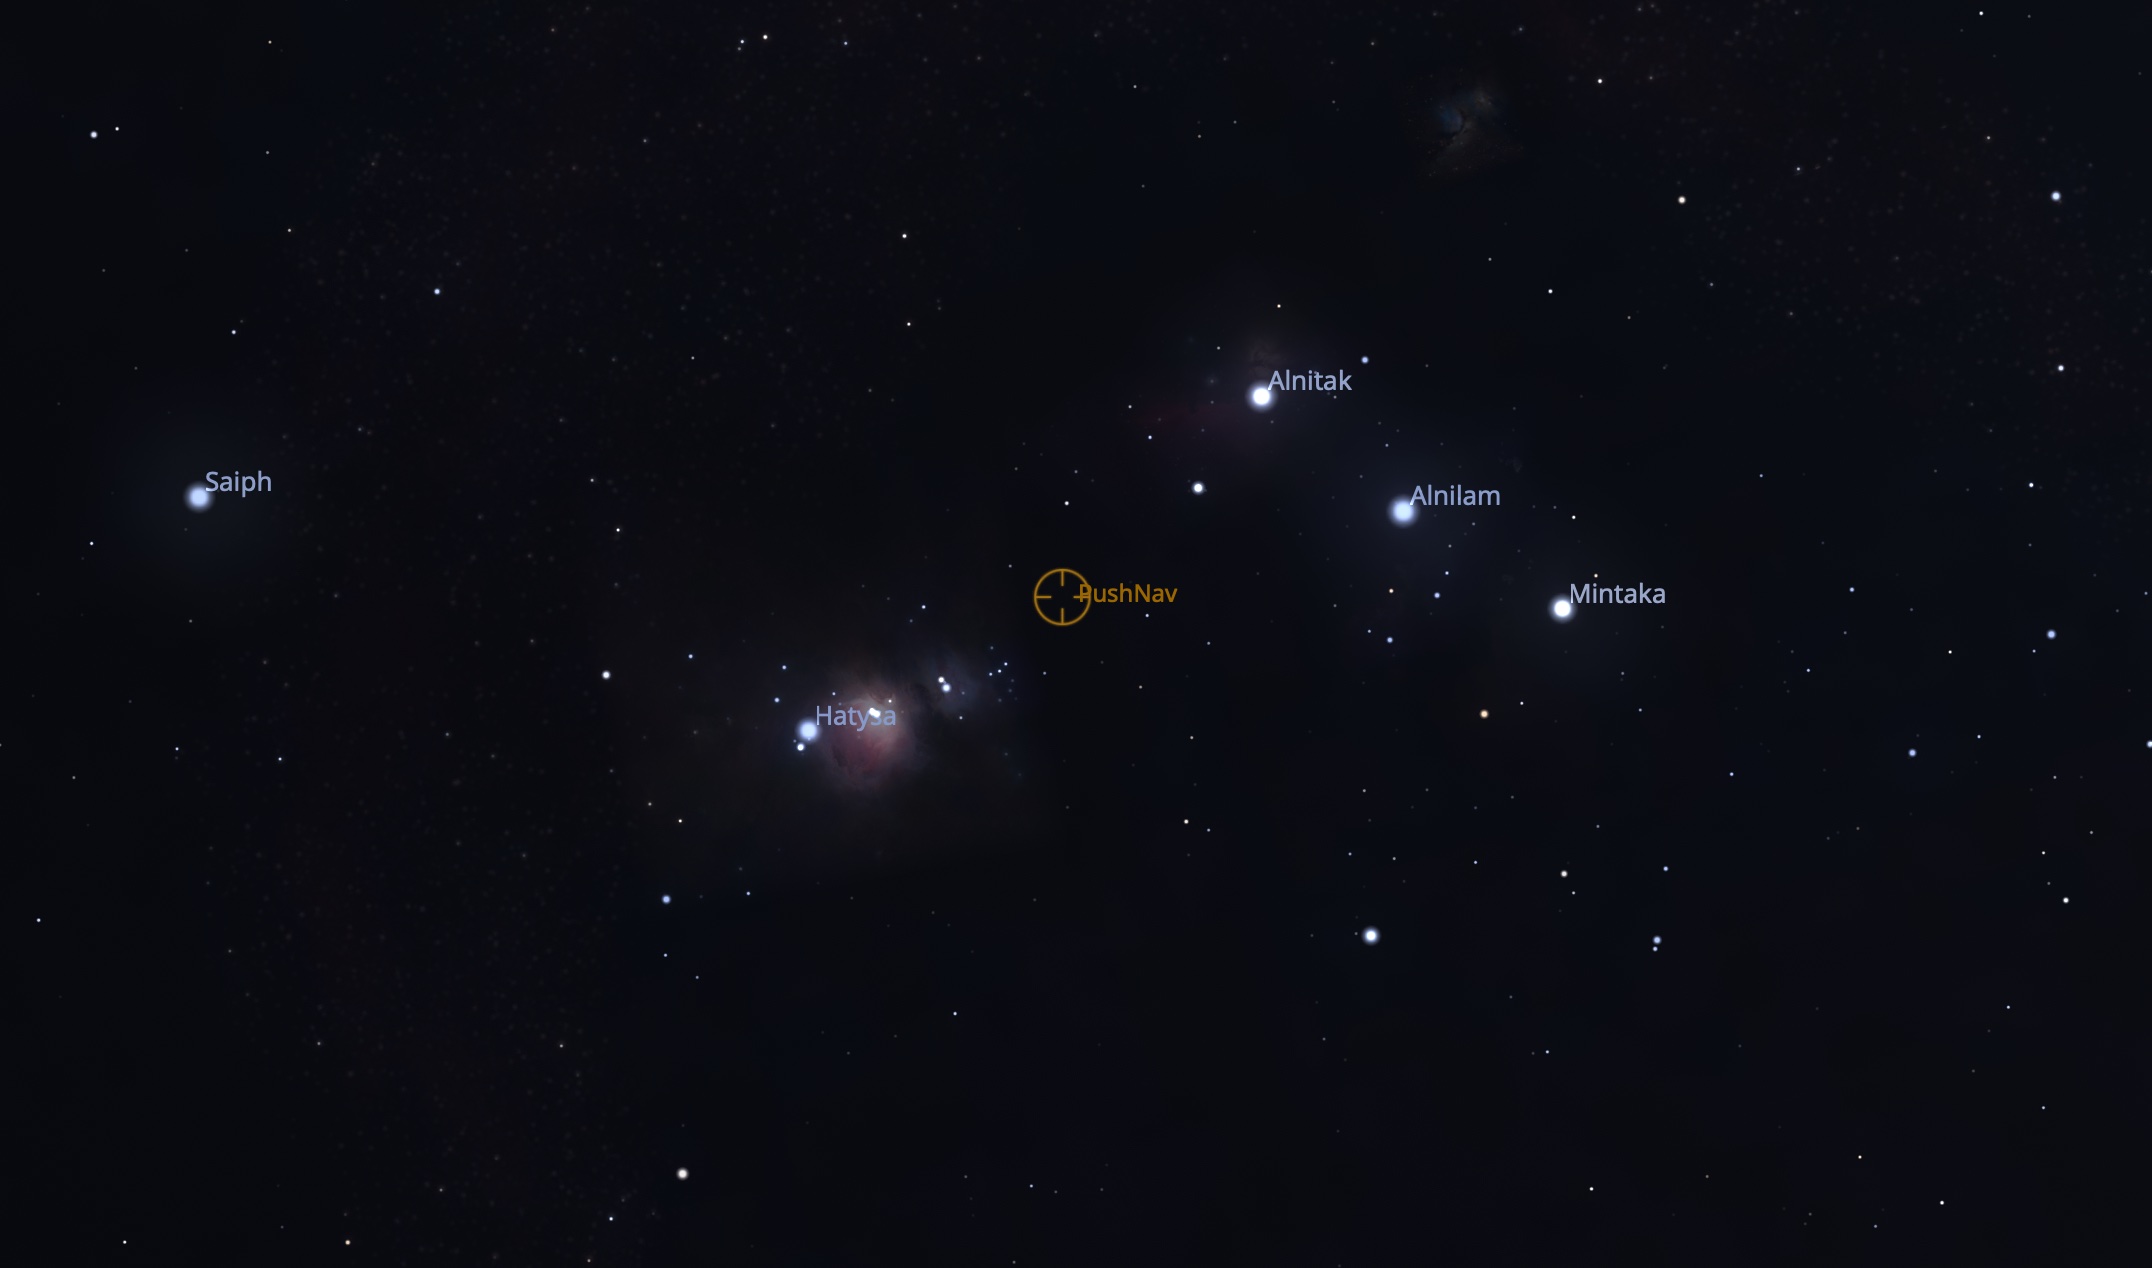
Push your telescope gently and watch the crosshair move in sync. No encoders, no motors. Just the camera seeing the stars and figuring out where it's looking.
Step 7: Pick a target
Click any object in Stellarium (a star, a nebula, a galaxy, anything). Stellarium highlights it with selection brackets.
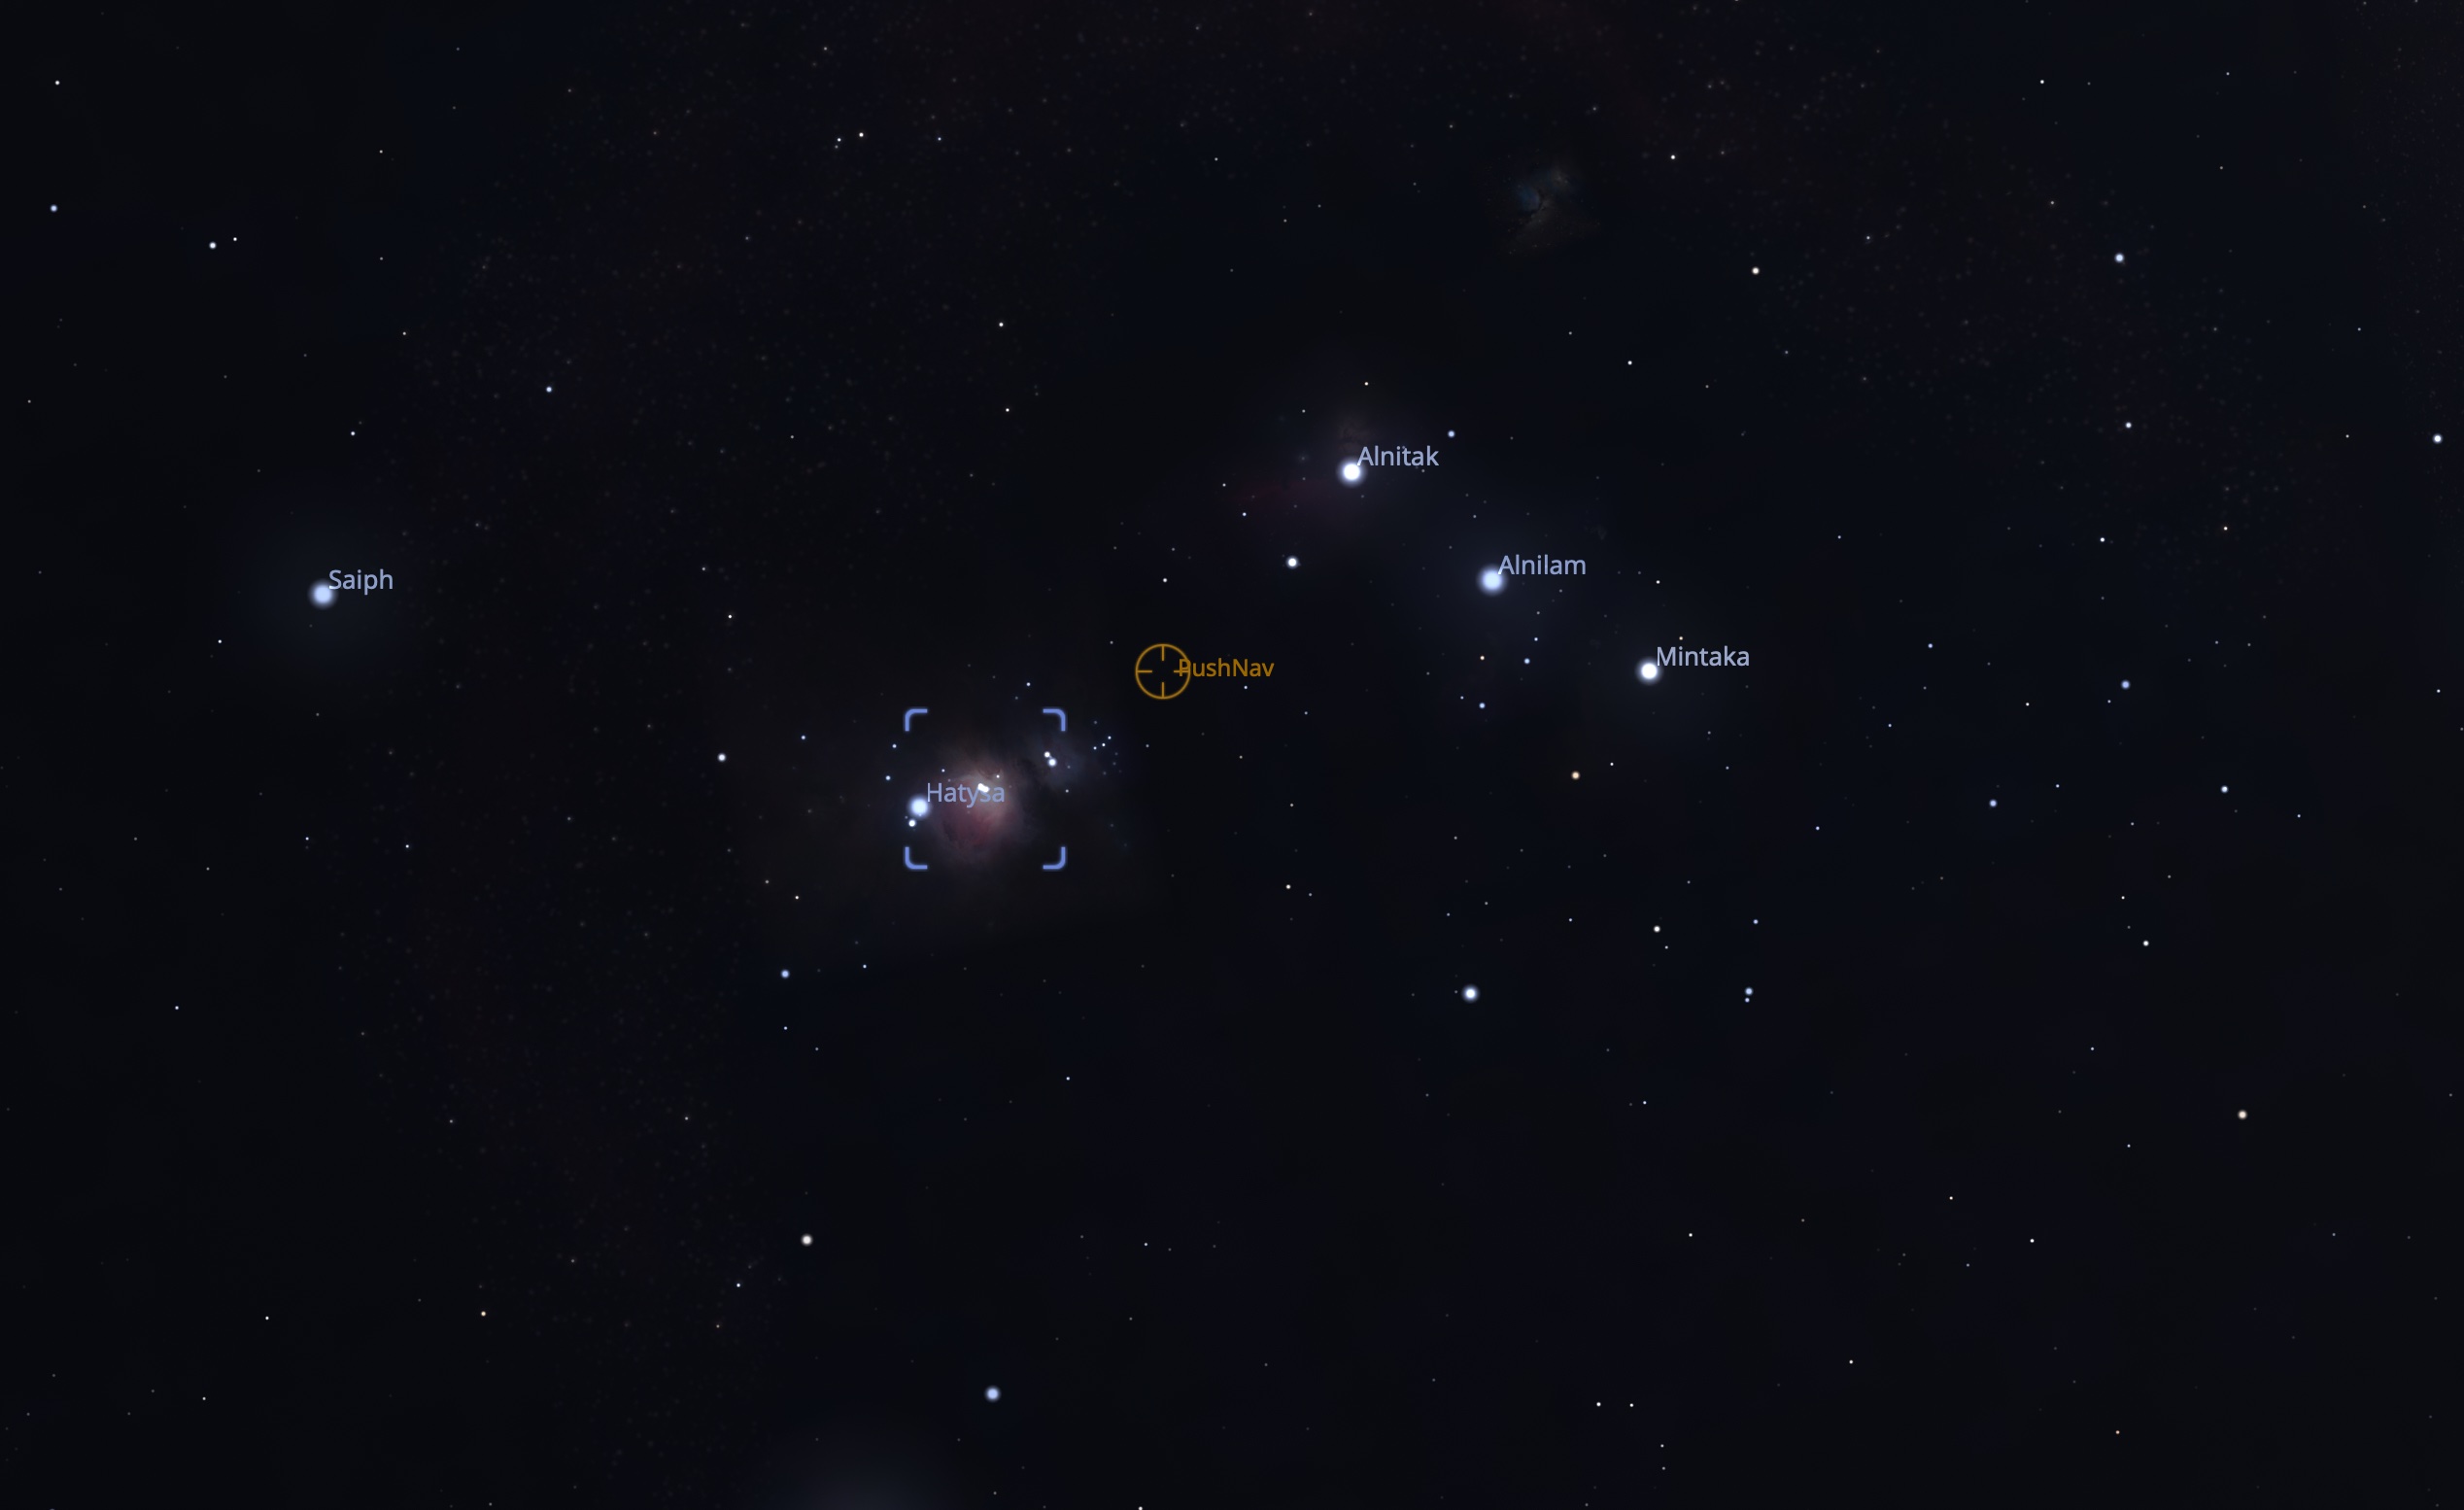
Now press Cmd+1 (Mac) or Ctrl+1 (Windows / Linux). This sends the target to PushNav.
Step 8: Push to it
Switch to PushNav. The side panel shows the target name and how far you need to push:
![]()
In this example, the Great Orion Nebula is 3.9° away: push the telescope left by 0.4° and down by 3.9° to reach it. The main view shows arrows pointing in the push direction.
As you push, the numbers shrink in real time. When they get close to zero, the target should be visible in your eyepiece. Center it by eye and enjoy the view.
To pick a different target, just click another object in Stellarium and press Cmd+1 again. To stop tracking, click Clear Target in PushNav.
Troubleshooting
Can't connect: status stays "Disconnected".
- Make sure PushNav is running before you click Connect in Stellarium. PushNav is the server; Stellarium connects to it.
The crosshair is in the wrong part of the sky.
- Check that the coordinate system in the telescope settings is set to J2000, not JNow. This is the most common cause.
- Make sure Stellarium's location and time are set correctly for where you are.
- Make sure PushNav has actually solved at least once. If the step indicator in PushNav still says Sync rather than Track, it doesn't know where it's pointed yet.
Cmd+1 / Ctrl+1 doesn't seem to do anything.
- You need to click an object in Stellarium first so it's selected (you'll see brackets around it).
- Make sure the telescope is connected (check the Telescopes dialog).
- On Mac, make sure Stellarium's window has focus before pressing the shortcut.
PushNav shows the target coordinates but not the name.
- PushNav gets object names from Stellarium's Remote Control plugin. If that plugin isn't enabled, coordinates still work but the name will be blank. To fix: go back to Configuration → Plugins, find Remote Control, tick Load at startup, and restart Stellarium.
What's next
Now that Stellarium is connected, head to Using PushNav to learn how to sync, calibrate, and start pushing to targets.